Thursday, November 5, 2015

The end of this week we are beginning the Element of Art Form.  We will be primarily concentrating on 3-D creations.  This will consist of origami
and pinch, slab, and coil pottery along with some free form clay sculpture.

We will first make in class a traditional Origami crane.  We will be using the ingenious flash animations from the web site Origami Club to help us figure out the complex folds.


Our next project involves making fun Origami:  Paper Planes!  Here is a quick video demonstrating the potential flight distance of a good paper plane:


And here is the video describing how to make that same paper airplane-  good luck!


Now for everyone's favorite class activity CLAY!

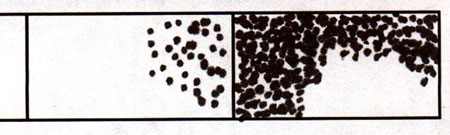
First things first, we need to know how to get the air bubbles out of the clay by WEDGING it.


Wedging the clay is essential for making the clay more pliable and getting any air bubbles out of it. While these bubbles may not cause problems while making hand built pots, they can potentially cause problems in the kiln during a firing.

Now lets make something!  Check out this cool video from fellow art teacher Molly Hazel demonstrating how to make pinch pot creations...


Next is a great how-to on slab built pots:


And Coil Pots:


And lastly, sculpture:


Monday, October 5, 2015

This week we are studying texture in art!


There are two kinds of texture, real and implied.  Real texture is, well...real. You can actually feel it with your fingers and it can be smooth or rough.  Real texture can be put under some paper and rubbed with a pencil or a crayon.  See if you can find at least 10 kinds near you and rub them in your sketchbook.  Implied texture is one that has been made to look like something else, like drawing wood grain on your paper, for example.  In your sketchbook, try to make four or five implied textures like sand, a rock, glass, fabric, wood grain, etc.

For about the next couple of weeks we will concentrate on two projects concerning texture.  First we will make a texture collage in a manner reminiscent of the work of Romare Bearden.  For a great overview about him and his art, check out the following video:


The second project will involve pressing textures into clay tiles (this will be our introduction to clay in of itself).

For the texture collage you will need the following:  one photo of yourself, clips of pictures from magazines, and scraps of cardboard, paper, and fabric.  Using the photo of yourself as the focus of the project, arrange and then glue these things onto a 12"x18" paper to create a scene that means something special to you.  

Monday, September 28, 2015

This week we start a new unit on value (lightness and darkness) in art.  We will begin with Phil Hanson of Goodbye Art Academy:


In drawing, there are typically two ways to approach shading:  continuous tone and half tone.
Continuous tone is a method where gray tones are actually used.  This can be achieved with pencil, pastel, color pencil, or charcoal by simply varying pressure on the paper.  With ink, water or a thinner must be added.
"Silver Ghost 1" by A. McEwen, 1992, pencil on paper.


"Silver Ghost 2" by A. McEwen, 1992, ink wash on paper.

Half Tone is a method where only one tone is used to achieve a shaded effect, usually black.
There are two general ways to shade in half tone:  Hatching/crosshatching and pointalism.  

Hatching/crosshatching is the use of lines to render shaded areas in a drawing.  The closer the lines are drawn, the darker the area appears.  These lines can be crossed to darken the area even more.  

   "Silver Ghost 3" by A. McEwen, 1992, Pen and Ink on paper.

The direction and evenness of the lines can be drawn in a variety of ways to change the overall feel of the drawing.

Pointillism is the deliberate grouping of dots to show lights and darks in a drawing.  The closer the dots, the darker the area appears.

"Silver Ghost 4" by A. McEwen, 1992, Pen and Ink on paper.

New students this week are responsible for the following assignments:

     1.  Draw three five step value scales on a 12"x18" drawing paper.  One will be continuous tone             in pencil, one pointillism with black marker, and one hatching/crosshatching with black ball
          point pen.


     2.  Students will draw a self portrait with shading using one of the methods learned this week.


Advanced students are responsible for the following assignment this week:

     1.  Students will create four identical drawings whose realism (no cartoons) draws heavily from lights and shadows (shading).  Each drawing will rendered in one of these four styles:  pointillism, continuous tone, hatching/crosshatching, and ink wash.


Thursday, September 24, 2015

This week we have primarily worked on two major projects:  drawing a bigger than lifesized picture of the hand using the newly learned technique "modified contour drawing" with a viewing plane (on 12"x18" paper) and drawing a self portrait.


The modified contour drawing of the hand was an extention of a technique we learned previously (last week) called blind contour drawing.  This consists of drawing something without looking at the paper.  The point is to train your brain to pay more attention to what you are drawing, not your paper. As I always like to say, "You really don't know what something looks like... until you look at it!"

Here is Phil Hanson of Goodbye Art Academy explaining...


Modified contour drawing is...well, modified from blind contour technique.  In this case you are able to look at your paper, but not very much.  You still have to spend about 95% of your time looking at the thing you are drawing.  Why you ask?  Because "You really don't know what something looks like until you look at it!"  

While you are looking at the thing you are drawing, you should also practice something called "Tracing with your eyes".  Imagine your eyes are the tip of your pencil and you are tracing the contour lines of the thing you are looking at- when your eyes move on those lines your pencil should move the same way on your paper.

I added one last component to this lesson, the use of a viewing plane in drawing.  This is a clear acrylic pane about 5"x7" with a cross drawn on it with a sharpie.  This tool can be used to compose a picture and draw proportions.

To help see their hand two dimensionally, it is recommended that they lay the viewing plane directly on their hand and actually trace it with a marker (as seen in the photo above).

For the portraits, we spent quite a bit of time discussing facial proportions and drawing a large example for practice.  Then we dived into drawing our first realistic self portrait using only line (on 12"x18" paper).

The following videos by Phil Hanson of Goodbye Art Academy wonderfully explain the process of drawing a portait.


Thursday, September 17, 2015

I just thought I would go over what we did on today and Tuesday...

Tuesdays and Thursdays in my art class consists of a ten minute bellringer, 15 minutes of drawing practice drills, and an open studio time for the students to work on unfinished assignments or try out new things of their own interest.

Tuesday I introduced them to timed figure and gesture drawing for practice drills.  This consists of students volunteering to be models for the rest of the class to draw in three minutes or less.  Their goal is draw the model's complete figure in under three minutes, filling up most of the space on their drawing paper.  Below, Phil Hanson of Goodbye Art Academy (my favorite art teacher), explains more about figure and gesture drawing.


Today I introduced them to another form of drawing called blind contour.  These exercises are invaluable for training beginning art students how to observe what they are drawing.

There is a common misconception among the general public that artists just make up the things they draw straight out of their head.  The truth is that you don't really know what something looks like until you LOOK at it.  BelowPhil Hanson describes in his goofy way all about Blind Contour Drawing.


Wednesday, September 16, 2015


Yesterday we learned about timed figure and gesture drawing!  

Today we will briefly discuss Right Brain Drawing Theory (Betty Edwards), draw some vases, and look at things upside down.  

The basis for the drawing theory that we will learn in this class comes from the book, "Drawing on the Right Side of the Brain" by Betty Edwards.  This, and the exercise that goes with it (Vases/Faces), is described in a nutshell by Christian Peterson below (you don't have to do the hand drawing...):


Building on the knowledge we learned from the Vaces/Faces exercise, we will now use another "trick" that will allow us to draw more realistically:   upside down drawing.

Upside down images and type are not easily recognized by the left side of the brain. When confronted by these flipped images the left gives up control of the drawing to the right side... The greatest key to your success here is to look and think of the parts of the drawing as lines, shapes, and spaces. Seriously try to avoid naming the things you are looking at and drawing. Watch the following video and do the drawing exercise along with the host.


Once you are done, draw the picture below upside down as well.

"Actor Dancing" by Torii Kiyotada


Monday, September 14, 2015

Here are a few examples of the projects that we did last week...


Today we start the first unit of our class:  LINE. Class will begin with this video by my favorite art teacher, Phil Hanson of Goodbye Art Academy:


Is it possible to create art that does not demonstrate line?   Mississippi Gulf Coast artist Walter Anderson heavily relied on line in his fluent drawings and watercolor paintings.    His work was famous for seven line types he learned when he was a young artist:  straight lines, wavy lines, zigzag lines, spirals, circles, half circles, and s-curves.  He would combine these line types and/or repeat them as patterns to achieve the look he was after.  As you watch the video below, how many of these line types can you see in his paintings?


Using 12"x18" paper, our project for today involves brainstorming and drawing these seven line types and the many patterns that are possible with them.  This can be approached one of two ways:

     1.  Divide the paper into 7 columns or sections and tightly fill each with your line and pattern    
          examples.
     2.  Demonstrate the 7 line types with patterns by filling the paper with each in a freeform way.

For materials you may use pencils, color pencils, pens, markers, rulers, and etc.

Returning students have the following extra projects to choose from in this unit:  Foamboard printmaking, wire sculpture, illuminated letters, and calligraphic pen and brush drawing.

To say Walter Anderson is one of my favorite artists is an understatement...

You know who standing in front of a one of Walter Anderson's murals in Ocean Springs, MS.